Mixing a hydroponic nutrient solution is a little more applied than you’d expect. Far from just throwing all the nutrients in a bucket of water. Getting your nutrient solution right is key. So here are our guidelines and some great tips on how to mix a hydroponic nutrient solution. To go back a step, first read our guide on Basic Hydroponics.
Definitions:
EC – Electric Conductivity. Measures the ‘strength’ of the nutrients in your hydroponic nutrient solution.
pH – potential Hydrogen – A number that shows the acidity or alkalinity of a solution. Neutral being 7, 1-6 being acidic and 7-14 being alkali.
Water
It generally doesn’t matter what water you use, but get to know as much about it as possible. Whether it’s collected rain water, reverse osmosis, tap water or borehole water. Become familiar with it’s pH and EC. If you’re using R/O water where a lot of elements have been removed, it has a low EC. This means you’ll have more “space” to work with for nutrients. Rain water also has a low EC but tends to be a bit acidic. It’s pH is around 6.5 while tap water generally has a pH of about 8.0. Borehole water can differ in EC and pH depending on location and recent rains.
Now is a good time for a great tip. When mixing your solution, never use any kind of metals as a reservoir, measuring cup or stirring instrument. Metals can influence the pH reading your meter will give you. Best to avoid metals in your hydroponic system completely.
Hydroponic Nutrients
Most hydroponic nutrients come in a 3 part liquid form. They are often color coded making them easy to dissolve and identify when mixing. The 3 parts are normally labeled as a ‘grow’, a ‘bloom’ and a ‘micro.’
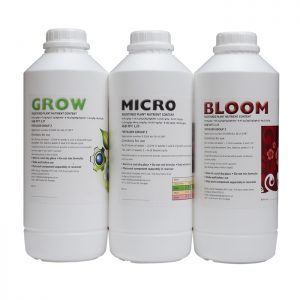
As plants develop they need different amounts of the macro and micro nutrients at different stages of growth. The macro nutrients consist of nitrogen, potassium and phosphorous taken care of by the ‘grow’ and ‘bloom’ nutrients. Micros provide your plants with the rest like calcium, magnesium, sulphur, boron, manganese, copper, iron, zinc and molybdenum. Nutrients do however differ very much from various producers. For the sake of this exercise we’ll stick to the usual 3 part liquid kind.
Mixing Your Hydroponic Nutrient Solution
Shake your nutrients well before use. Never mix all your nutrients together before adding them to your reservoir. Rinse measuring aids between each use.
For the purpose of this post, we will continue with R/O water. Fill your reservoir with the desired volume of water and get an EC reading. This will give you your starting point. Lets say the EC for example is 0.175 and you want your final solution to be 1.5. Now you know that you have 1.325 to play with. Had you used tap water with a higher starting EC, your headroom for nutrients will be lower. Due to tap water’s dissolved solids, you’d maybe only have 1.0 or less depending on tap water quality.
If you are using any silica products, they should always be added to your hydroponic nutrient solution first. If your grow is not a DWC or the like, but rather coco, silica can be fed on it’s own. Your reservoir should be mixed well after each nutrient is added to the solution.
Our Hydroponic Nutrient Kit has everything you need from seed to harvest. Allowing for full control, you’ll provide your plants with balanced nutrition in all stages of growth.
Additives
If you aren’t using any silica products, the first nutrient you will add to your solution is cal mag. This either comes in liquid form or granules being the most popular. With a measuring cup, scoop up some water and dissolve the advised amount of cal mag. Now add it to your reservoir and mix well.
Silica and calcium can sometimes cause problems with each other when used together leaving a struvite precipitate. Some growers alternate their solutions, one with silica and no calmag. With the next solution change, cal mag and no silica.
Macro’s & Micros
Next, you’ll add your Micro nutrients. Silica supplements, cal mag’s and micros tend to influence the solution’s pH the most of all the nutrients and additives. This is why they always go first and in that order. If you aren’t using silica or cal mag, then micro would be your first to use. Follow the dosage instructions on the bottle first diluting the nutrients before adding to the reservoir. Stir well to ensure everything is mixed properly.
The last two to be added are the Grow and Bloom nutrients. In our experience, it doesn’t matter which of the two are added to the hydroponic nutrient solution next. It’s more important to follow the steps as above by first diluting the nutrients in a small amount of water.
More Additives
Once your nutrients are in, it’s time to add your hydrogen peroxide. H2O2 is a strong oxidizing agent and very useful in hydroponics. It can keep roots healthy and your hydroponic nutrient solution sterile for a few days. Again, follow the instructions on the bottle but do be very careful with the H2O2, it’s strong stuff.
Now Let your solution stand for around 30 mins. This allows the solution to ‘settle’ before you start testing EC or pH, which is the next step. Here’s a quick summary of the order to follow stirring well inbetween:
- Silica supplements
- Calcium & magnesium supplements
- Micros
- Grow / Bloom
- Hydrogen Peroxide
This is the time to test the EC of your nutrient solution to make sure it’s at the desired level. Too high, and you’ll burn your plants. Different plants and veg like different EC’s so it’s best to get to know what’s best for those you grow. If you are a beginner, it’s a good idea to test the EC and ph of the solution after each step. This will help you learn how the nutrients influence your solution as you add them.
pH Correcting Hydroponic Nutrient Solutions
pH correction should always be the last thing you do when mixing your solution. Ideally, your pH needs to be between 5.5 and 6.5. Nutrients are only available to plants within this pH range so it is rather important.
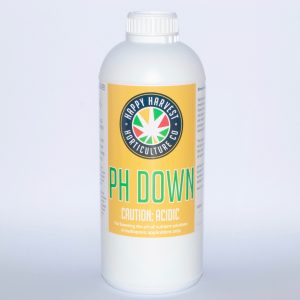
pH Down(Opens in a new browser tab)
Use very small amounts of pH up and down to achieve the desired pH. Test between each dose until you get pH where you want it. If you’ve never used pH down or pH up before, best to practice first. A 10l bucket of plain water can help get an idea of how much you’ll need.
Let your solution stand for another 30 mins and test pH again as it may change over time. Gases like carbon dioxide from the atmosphere dissolve into the solution or from aeration changing pH. Correct the pH again if needed, if not your solution is good to go!

More Reservoir Tips:
Nutrient deficiency? It’s probably just a pH problem. The pH of a solution can either go up or down over time. As this happens, certain elements can become unavailable to your plants. This can cause a visible deficiency of some kind like yellowing leaves. It often happens that the specific nutrient is still in the solution, it’s just unavailable to your plant. Calibrate your pH meter and adjust pH if needed. If the problem still persists, mix a new solution for your reservoir from scratch.
Aerate your solution with an air stone and pump. This keeps dissolved oxygen levels in the water to a maximum. High levels of O2 slows down root rot and provide much needed oxygen to the root zone. Tools such as the 100mm (4″) Airstone, the BOYU S-1000 Air Pump and Clear Air Line Pipe 1m can assist.
Solution temps are really important too. Once a solution’s temp rises above 22 degrees, bacteria can start to grow. This can cause all sorts of problems. Temps too low are also not good as growth in cannabis plants can slow down. Ideally, keep your reservoir temps around 16-18 degrees for best results.
Keep your reservoir sealed as best as you can. Higher moisture levels increase humidity bringing with it mildew and bud rot.
In a DWC scenario. If water levels are dropping and EC is rising, then your plants are ‘thirsty’ rather than ‘hungry’ for example. Drop the overall EC of your solution. If water levels are dropping slowly while EC is going down fast, your plants are hungry. Refresh your reservoir or go for a slightly stronger solution with the next change.
Adding food grade Hydrogen Peroxide (35% or higher) to your solution will increase the amount of dissolved oxygen. This is a preventative measure against root rot. H2O2 will also keep your hydro setup sterile. More on hydrogen peroxide here


1 Comment
Nutrient Stock Solution - How To Guide - Happy Harvest · February 17, 2025 at 1:17 pm
[…] our guide on How To Mix A Hydroponic Nutrient Solution for more info on mixing tanks and feeds. If you’re totally new to these concepts, read our […]